Using Planisys DNS RPZ with ProtonVPN
Introduction
This section explains how to configure Proton VPN to use a Planisys DNS server with RPZ (Response Policy Zone) protection. This combination blocks ads, malware, and trackers at the DNS level. When integrated with the VPN, it adds an extra layer of security and improves browsing experience. Ideal for protecting mobile or corporate users while maintaining unified policies.
Requirements
Have an active Proton VPN account
Have the Proton VPN app installed (Windows, macOS, Linux, Android, or iOS)
Have the IP addresses of the Planisys RPZ DNS servers
Objective
Force the use of Planisys DNS from Proton VPN so that all browsing, even over VPN, is filtered through real-time security and ad-blocking policies.
Advantages
Blocks ads and trackers without installing browser extensions
Protection against malicious sites through DNS policies
Works across all browsers and system-wide apps
Allows applying centralized filtering policies
General steps
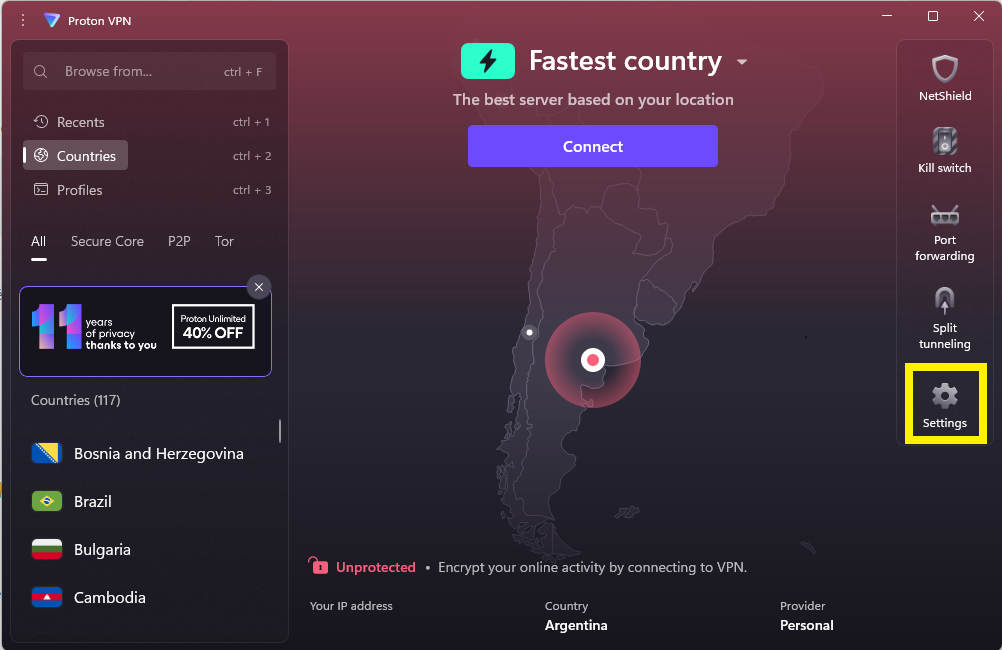
Open the Proton VPN application
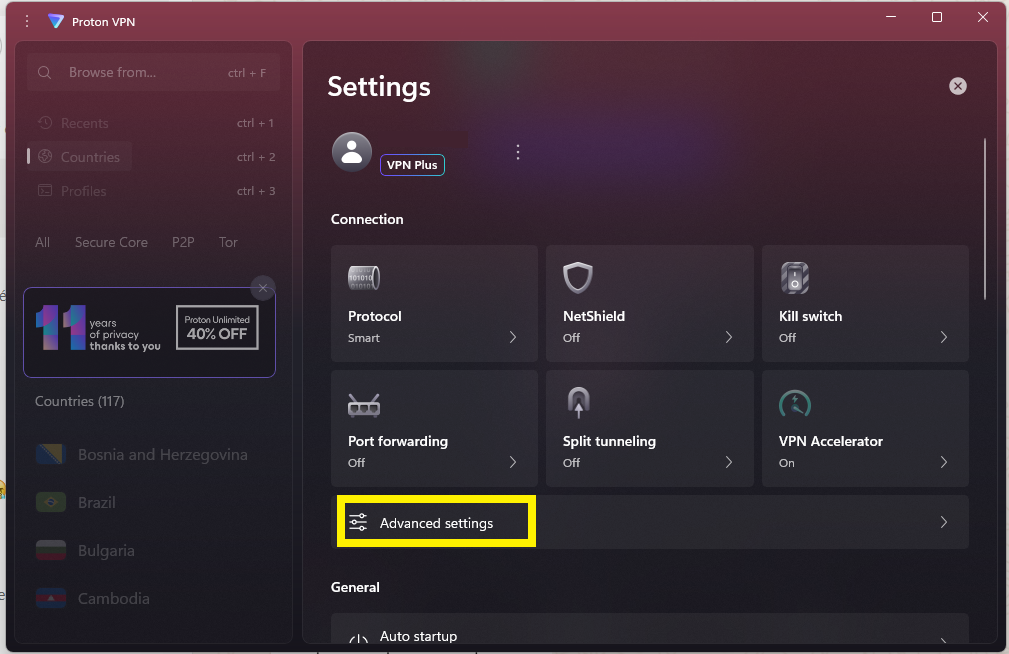
Go to the settings and click on Advanced Options
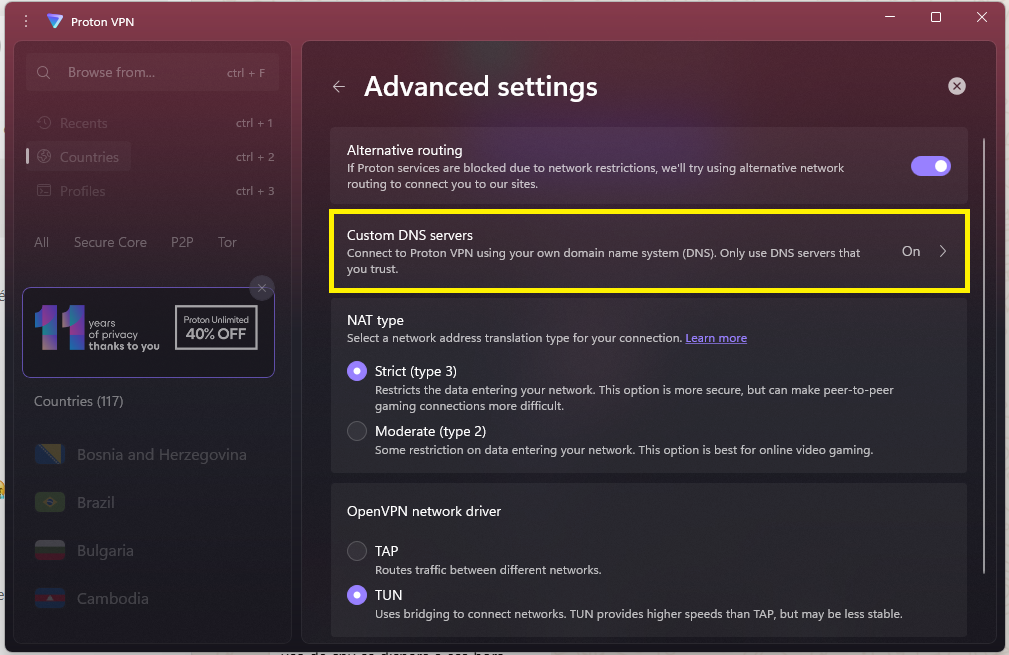
Locate the Custom DNS section
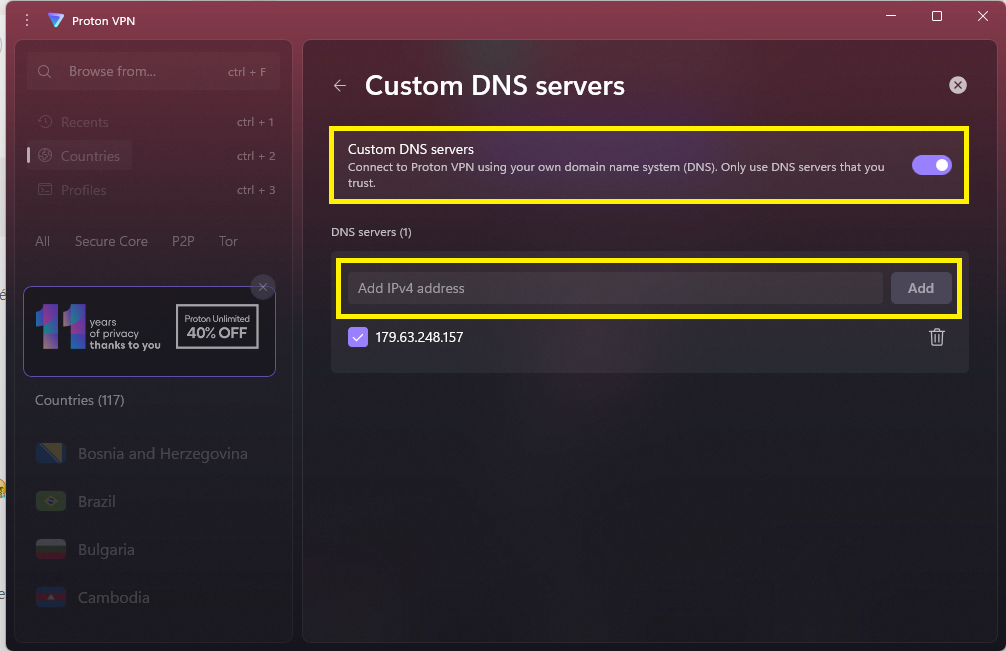
Enable Custom DNS servers and enter the IPs provided by Planisys (e.g.,
190.216.0.XXand190.216.0.XX).Save changes and reconnect the VPN
Additional notes
Some Proton VPN servers may enforce their own DNS settings. It is recommended to try different server locations if it does not work initially.
For greater control, it can be integrated with DoH or DoT for increased security.