Como configurar el Mikrotik para dirigir el puerto 53 a un DNS con seguridad RPZ
Introduction
There are two ways to configure it, via CLI or GUI. I’ll explain each method:
Por cli hay dos soluciones:
Solucion 1:
# Configuración para redirigir el tráfico DNS (UDP y TCP) al puerto 53
/ip firewall nat add chain=dstnat protocol=udp dst-port=53 action=redirect to-ports=53
/ip firewall nat add chain=dstnat protocol=tcp dst-port=53 action=redirect to-ports=53

# Configuración del servidor DNS del MikroTik para utilizar la IP xxx.xxx.xxx.xxx
/ip dns set servers= xxx.xxx.xxx.xxx

# Habilitar el uso de caché DNS en el router para permitir solicitudes remotas
/ip dns set allow-remote-requests=yes
Solucion 2: No requiere conntrack ni NAT
# 1. Disable conntrack for IPv4 DNS
/ip firewall raw
add chain=prerouting protocol=udp dst-port=53 action=notrack
add chain=prerouting protocol=tcp dst-port=53 action=notrack

# 2. Routing-mark for IPv4 DNS
/ip firewall mangle
add chain=prerouting protocol=udp dst-port=53 action=mark-routing new-routing-mark=dnsroute
add chain=prerouting protocol=tcp dst-port=53 action=mark-routing new-routing-mark=dnsroute

# 3. Routes for intercepted IPv4 DNS
/ip route
add dst-address=0.0.0.0/0 gateway=xxx.xxx.xxx.xxx routing-mark=dnsroute

# 4. Disable conntrack for IPv6 DNS
/ipv6 firewall raw
add chain=prerouting protocol=udp dst-port=53 action=notrack
add chain=prerouting protocol=tcp dst-port=53 action=notrack

# 5. Routing-mark for IPv6 DNS
/ipv6 firewall mangle
add chain=prerouting protocol=udp dst-port=53 action=mark-routing new-routing-mark=dns6route
add chain=prerouting protocol=tcp dst-port=53 action=mark-routing new-routing-mark=dns6route

# Exclusions (optional but recommended)
add chain=prerouting src-address=2a0c:xxxx:xxxx::66 action=accept
add chain=prerouting src-address=2a0c:xxxx:xxxx::67 action=accept

# 6. Routes for intercepted IPv6 DNS
/ipv6 route
add dst-address=::/0 gateway=2a0c:xxxx:xxxx::66 routing-mark=dns6route
add dst-address=::/0 gateway=2a0c:xxxx:xxxx::67 routing-mark=dns6route
Warning
Esta configuracion NO requiere NAT ni conntrack
Donde dice gateway=xxx.xxx.xxx.xxx, src-address=2a0c:xxxx:xxxx::66 y src-address=2a0c:xxxx:xxxx::67 se refiere a las ipv4 e ipv6 del resolver
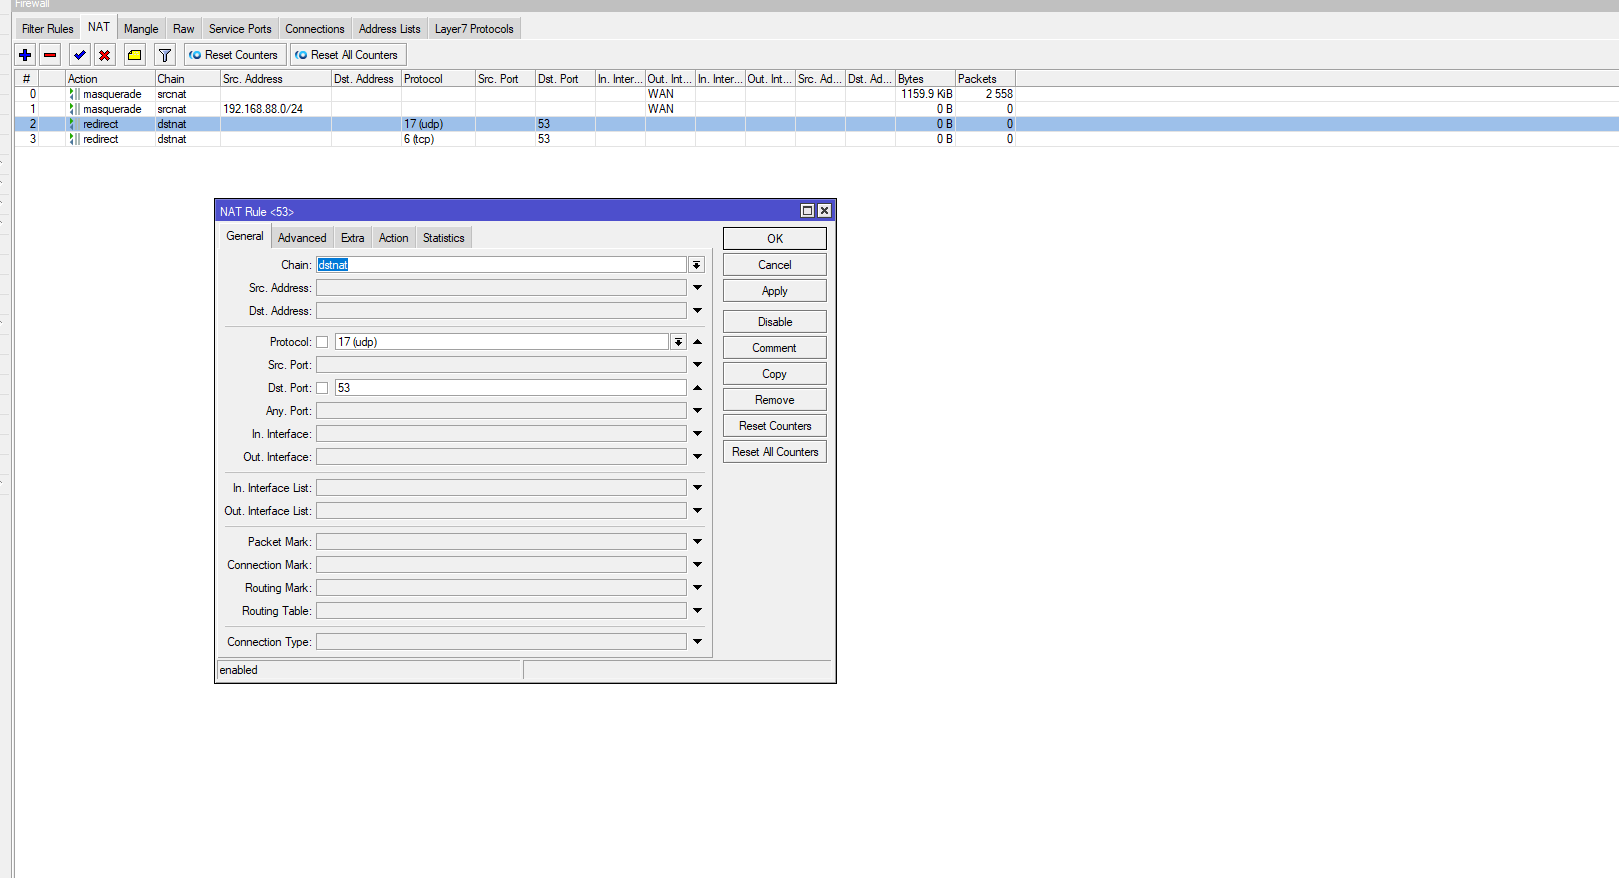
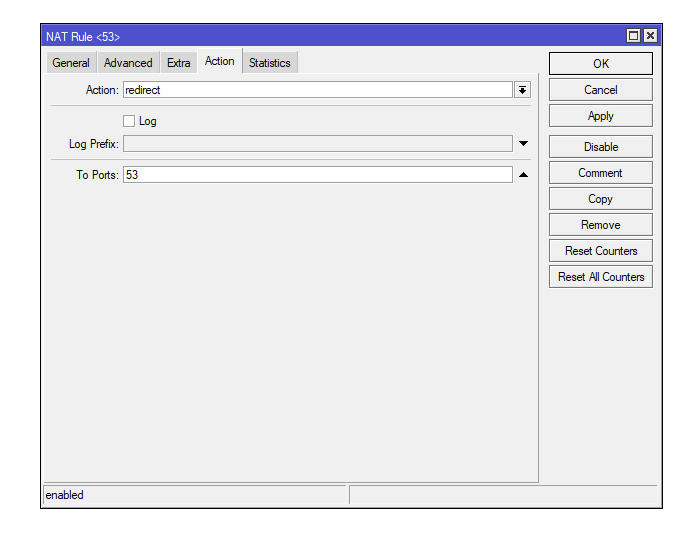
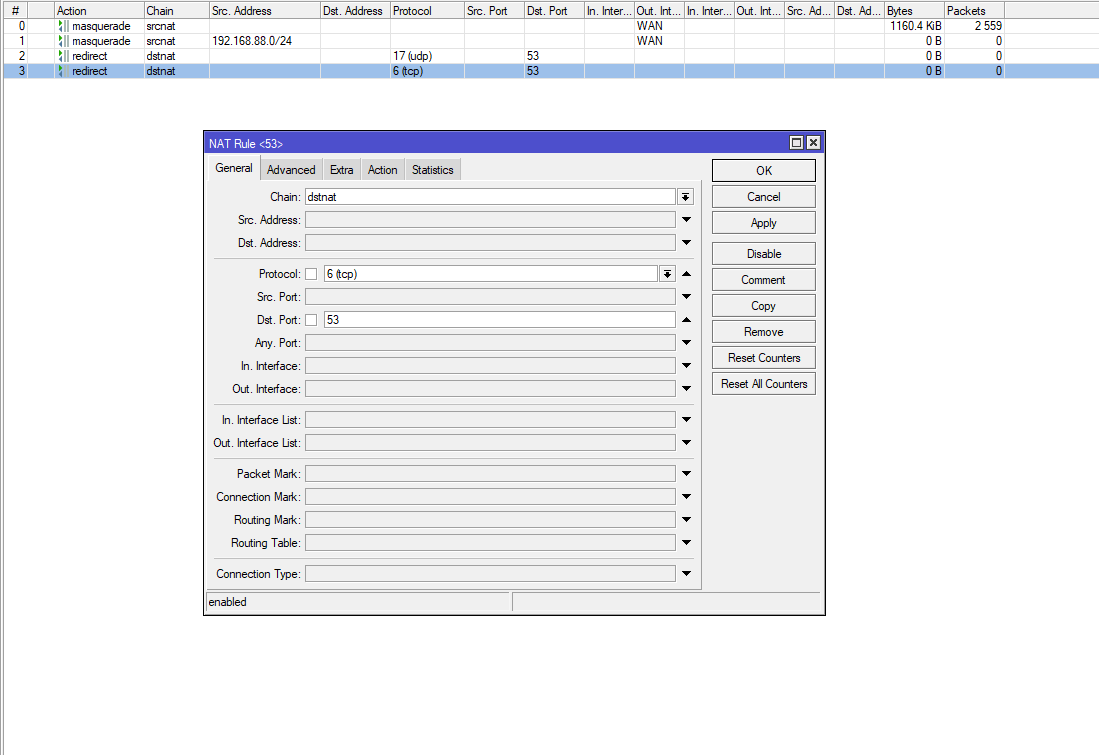
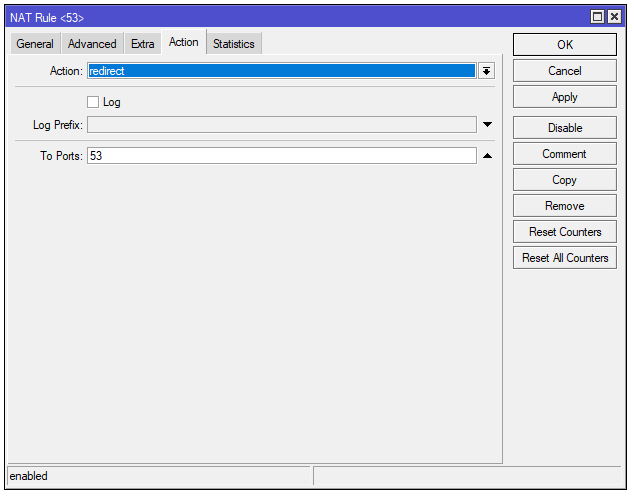
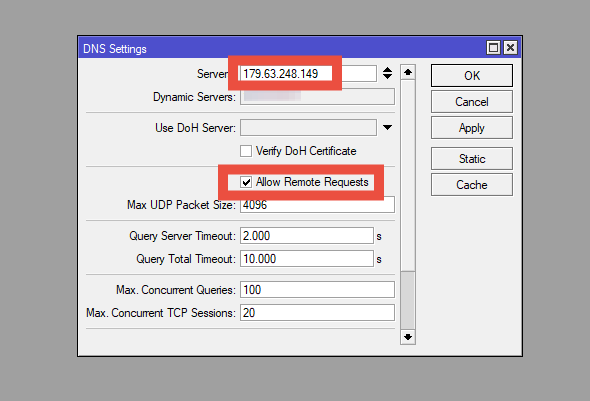
Using GUI, it would be as follows:
These images correspond to the DNS traffic redirection
This image shows the configuration of the RPZ IP and the cache usage enablement
Brief summary of the aforementioned options
1- DNS Traffic Redirection to Port 53: Configures firewall rules to capture all DNS traffic (both UDP and TCP) using port 53 and redirect it to the router itself. This ensures that all name resolution requests pass through the router, regardless of the DNS server the network devices try to use.
2- DNS Server Configuration in MikroTik: Specifies the DNS server that the router will use to resolve DNS requests. This configuration allows MikroTik to act as an intermediary, redirecting requests to the configured DNS server (for example, a public or private DNS server).
3- Allow Remote Requests and DNS Cache Usage: Enables the router to accept DNS resolution requests from devices connected to the local network. By doing this, MikroTik can act as a DNS server for the network, resolving queries and storing the responses in cache to improve performance.