. _upload_multiples:
Upload de registros múltiples
To import a complete DNS zone from a text file, follow these steps:
Access the PDNS administration panel:
Log in using the provided credentials.
Click the +Import Zone button.
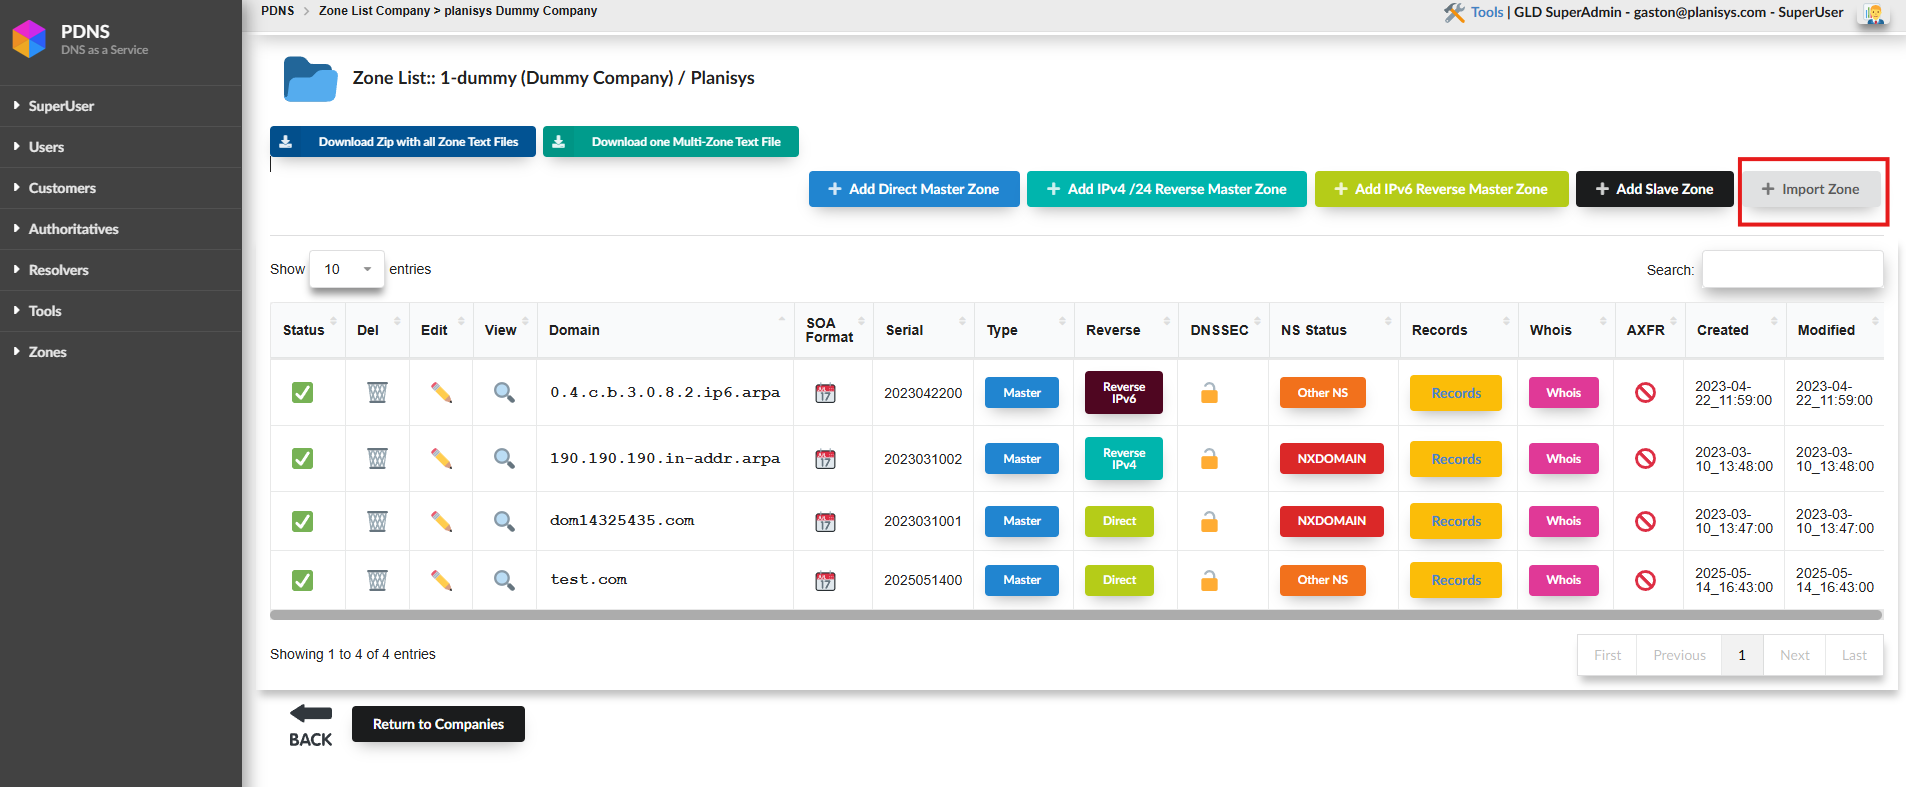
A screen will appear where you must:
Select the NS-Set. Choose:
globaldnsUpload the .txt file that contains the zone records.
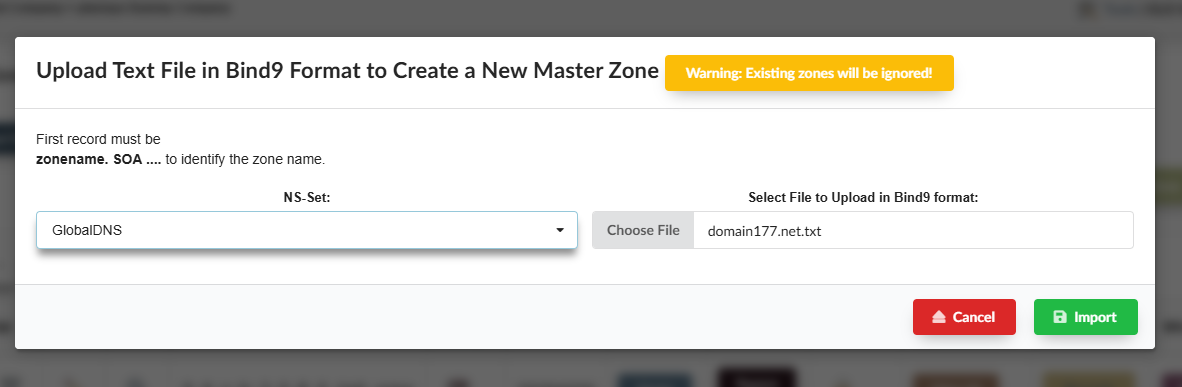
The file must follow the format below:
Warning
The file must strictly comply with the classic BIND9 format for all records. This includes:
Each line must have fields properly separated by tabs or spaces.
The domain name must be an FQDN (ending with a dot).
The first record must be an SOA record to identify the zone name.
All TTLs, classes (IN), and types (A, MX, etc.) must be explicitly defined.
Example:
;
;  PDNS exported at 2025-05-14 13:41:02
;
domain177.net.                3600    IN    SOA   pdns1.live. hostmaster.planisys.com      2023103006     10800     3600   604800     3600
domain177.net.                3600    IN    NS    pdns-1.planisys.net.
domain177.net.                3600    IN    NS    pdns-2.planisys.net.
name2.domain177.net.          3600    IN    AAAA  2803:bc00::17
tots.com.ar.domain177.net.    3600    IN    CNAME ghs.googlehosted.com.
xyz.domain177.net.            3600    IN    MX    10 avas-mx-corpmail7-1.planisys.net.
_sip._tls.domain177.net.      3600    IN    SRV   10 100 443 sipdir.online.lync.com.
_sip._tls.domain177.net.      3600    IN    SRV   10 100 443 sipdir.online.lync.com.
After uploading the file, confirm the import.
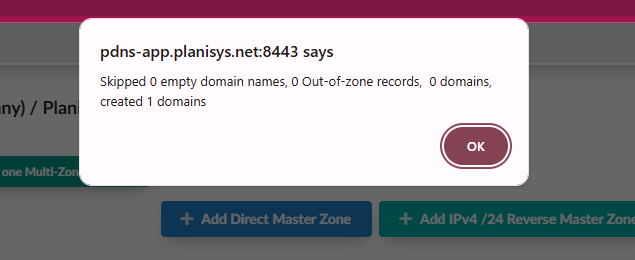
Once finished, a popup will display the created records:
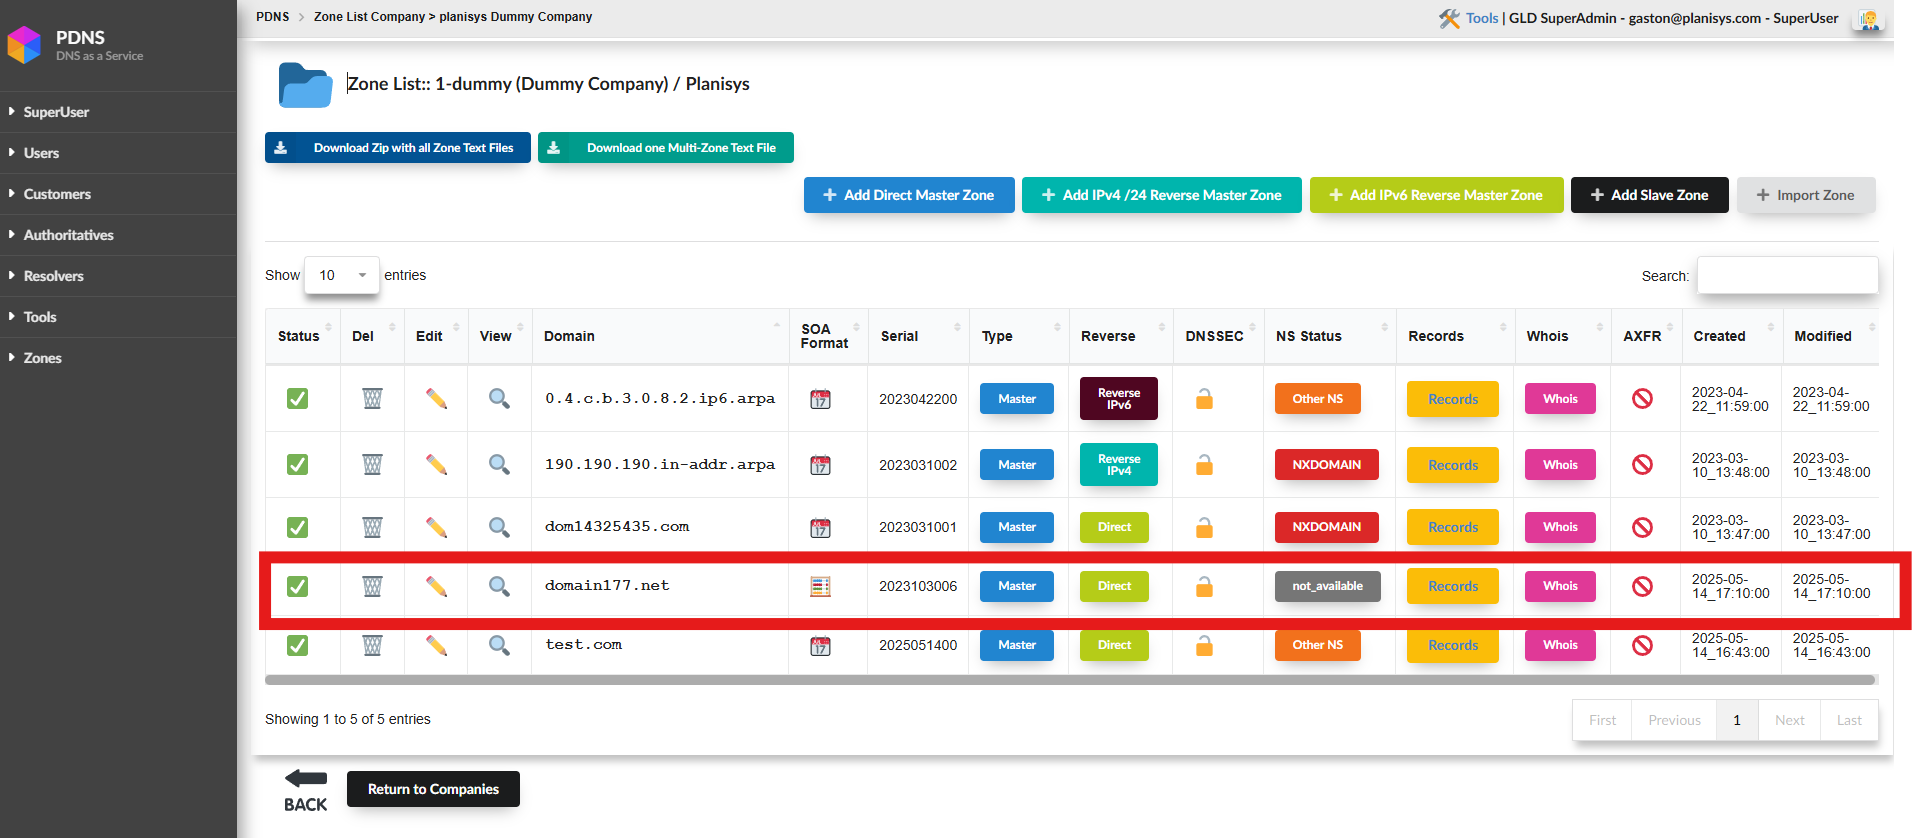
The zone will now be created and visible in the zone list:
Recommendations
Ensure that all FQDNs end with a dot (.), such as domain177.net. or ghs.googlehosted.com.
Do not leave empty lines between records.
Follow logical order: SOA → NS → other RRs.