Android Configuration
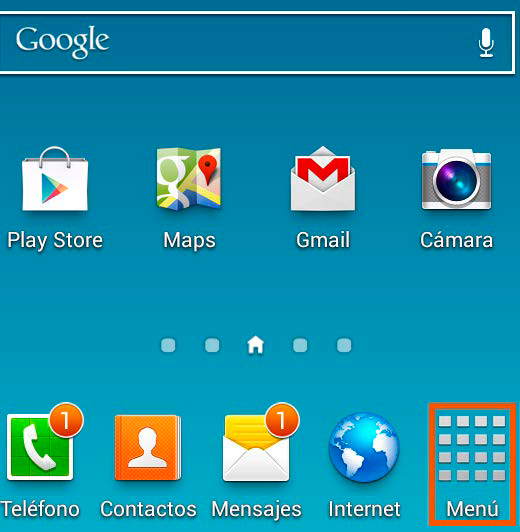
Step 1 Open the Apps Menu
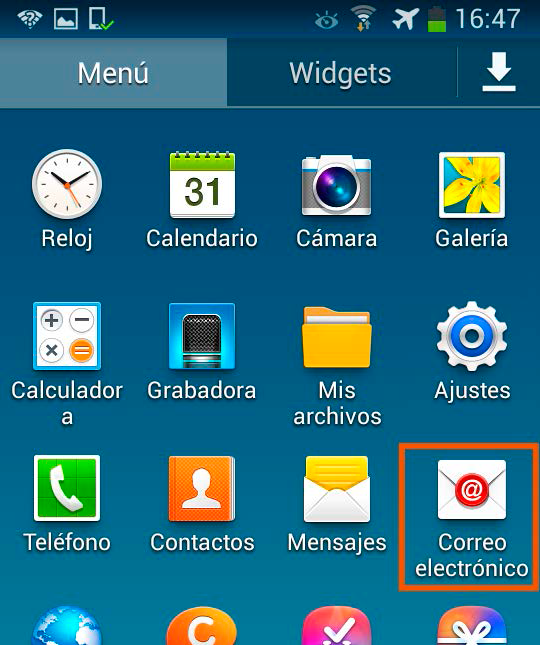
Step 2 Access the Email app
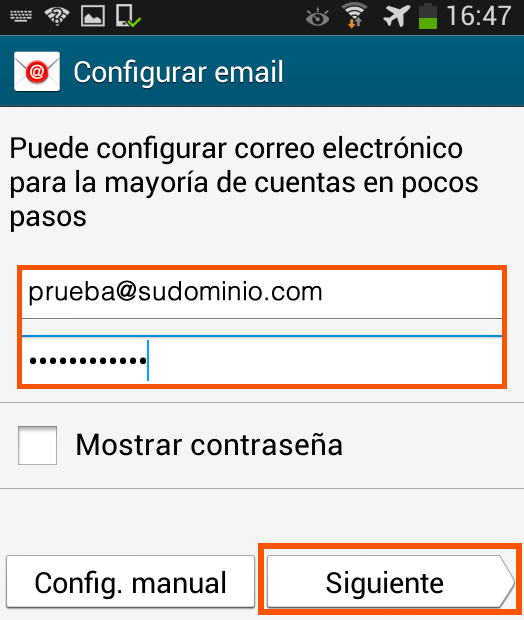
Step 3 Enter your email address and password, then press Next
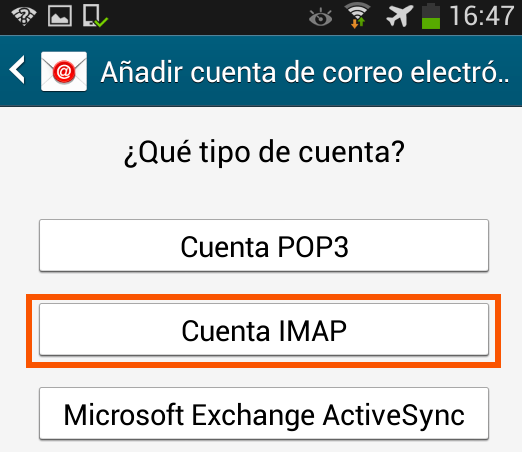
Step 4 Select IMAP Account as the account type
Step 5
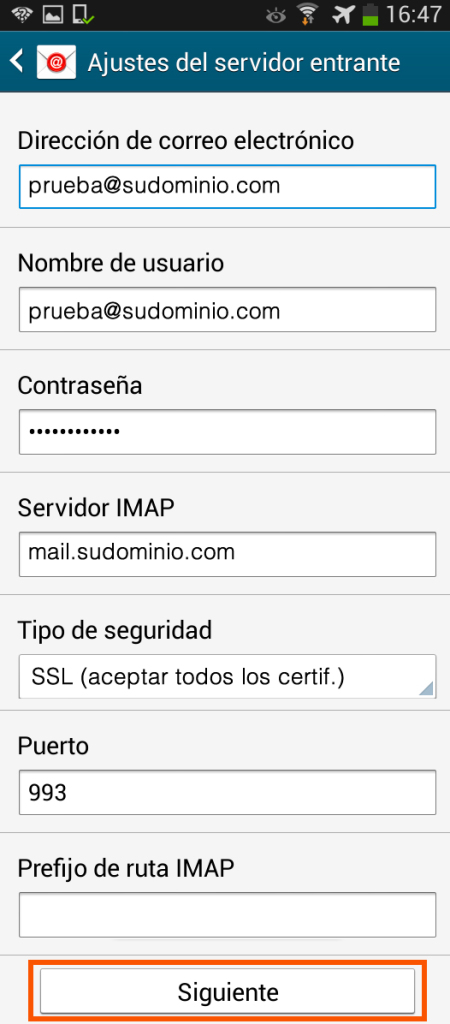
Incoming server settings Enter the following information:
Email address: Your email address
Username: Again, enter your email address
Password: Enter your password
Servidor IMAP: mail.sudominio.com
Security Type: SSL
Puerto: 993
IMAP path prefix: Leave this field blank
Then tap the Next option
Step 6
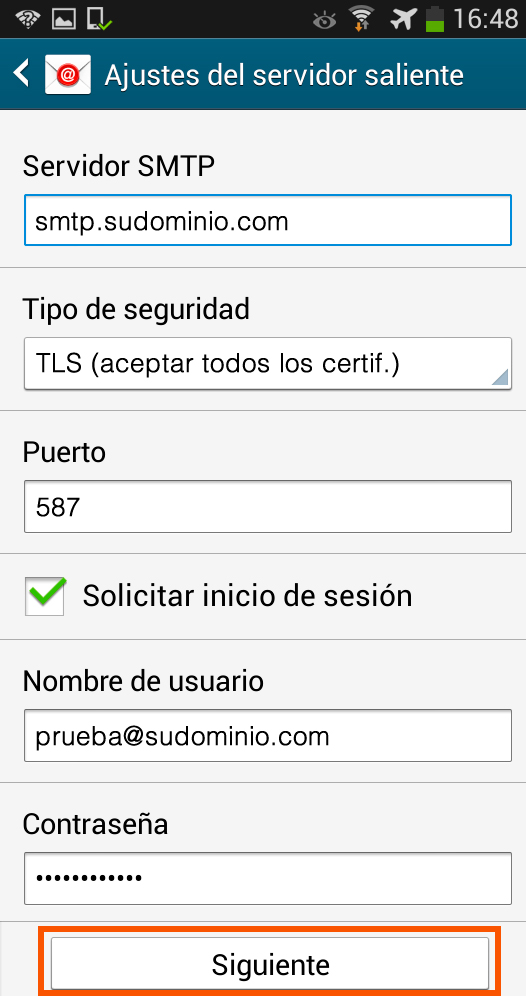
Outgoing server settings SMTP server: smtp.yourdomain.com
Security type: TLS
Puerto: 587
Require sign-in: Check this option
Username: Enter your email address
Password: Enter your password
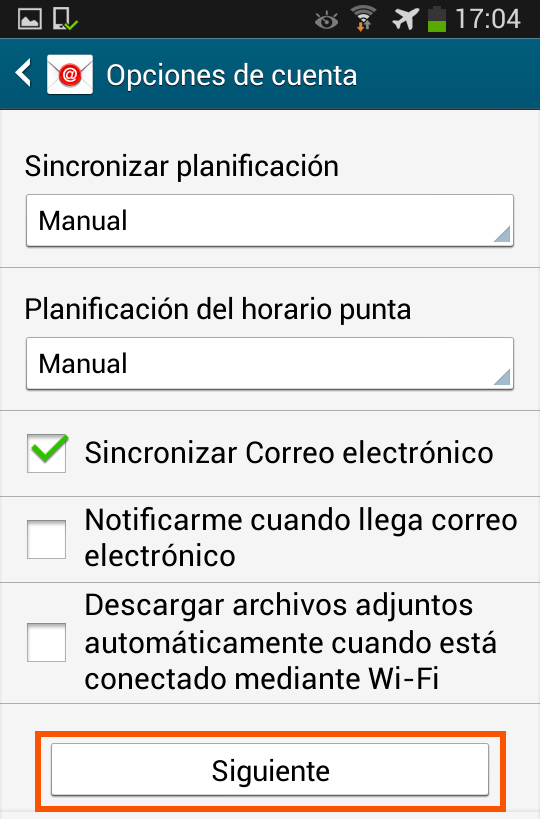
Step 7 Select Sync schedule and a screen will open that allows you to select the Email check frequency and choose the desired interval.
If you want to be notified when you receive an email, select Notify me when email arrives and tap the Next button to continue
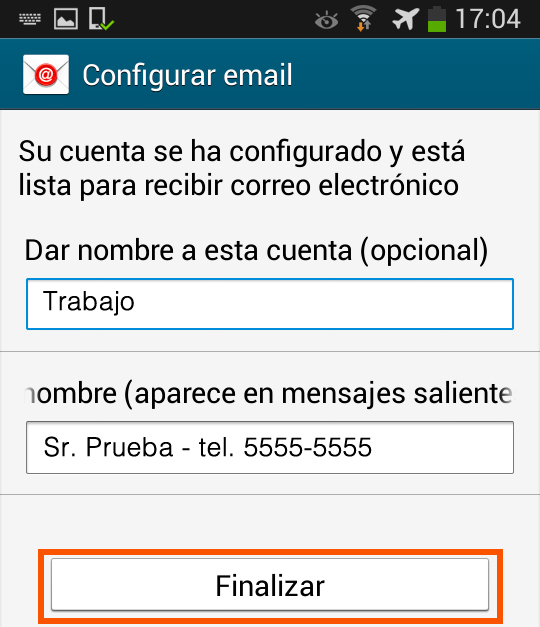
Step 8 On the last screen, configure the following fields:
Give this account a name (optional field that identifies the account if you have many others on the same device) and Name (appears in outgoing messages as the signature).
By tapping the Finish button, the email account setup is completed.
Email messages will be downloaded to the device.