How to Configure MikroTik to Redirect Port 53 Traffic to an RPZ-Protected DNS Server
Introduction
There are two ways to configure it: via CLI or through the GUI. Both methods are explained below.
Using the CLI:
Solution 1:
To review and compare the current connection tracking usage, you can use:
/ip firewall connection print count-only
/ip firewall connection tracking print
It is also recommended to reduce the UDP timeouts:
/ip firewall connection tracking set udp-timeout=3s
Create an address list with the IP addresses of the correct Planisys resolvers for the customer’s installation, for example:
/ip firewall address-list
add list=planisys-dns address=179.63.248.113
add list=planisys-dns address=131.108.43.113
Apply a NAT rule to redirect UDP/53 traffic to the Planisys resolvers, and make sure it applies ONLY to requests directed to other DNS servers, such as 8.8.8.8, 1.1.1.1, or resolvers belonging to an attacker. This reduces conntrack usage to misconfigured clients only:
/ip firewall nat
add chain=dstnat protocol=udp dst-port=53 dst-address-list=!planisys-dns action=dst-nat to-addresses=179.63.248.113
add chain=dstnat protocol=tcp dst-port=53 dst-address-list=!planisys-dns action=dst-nat to-addresses=131.108.43.113
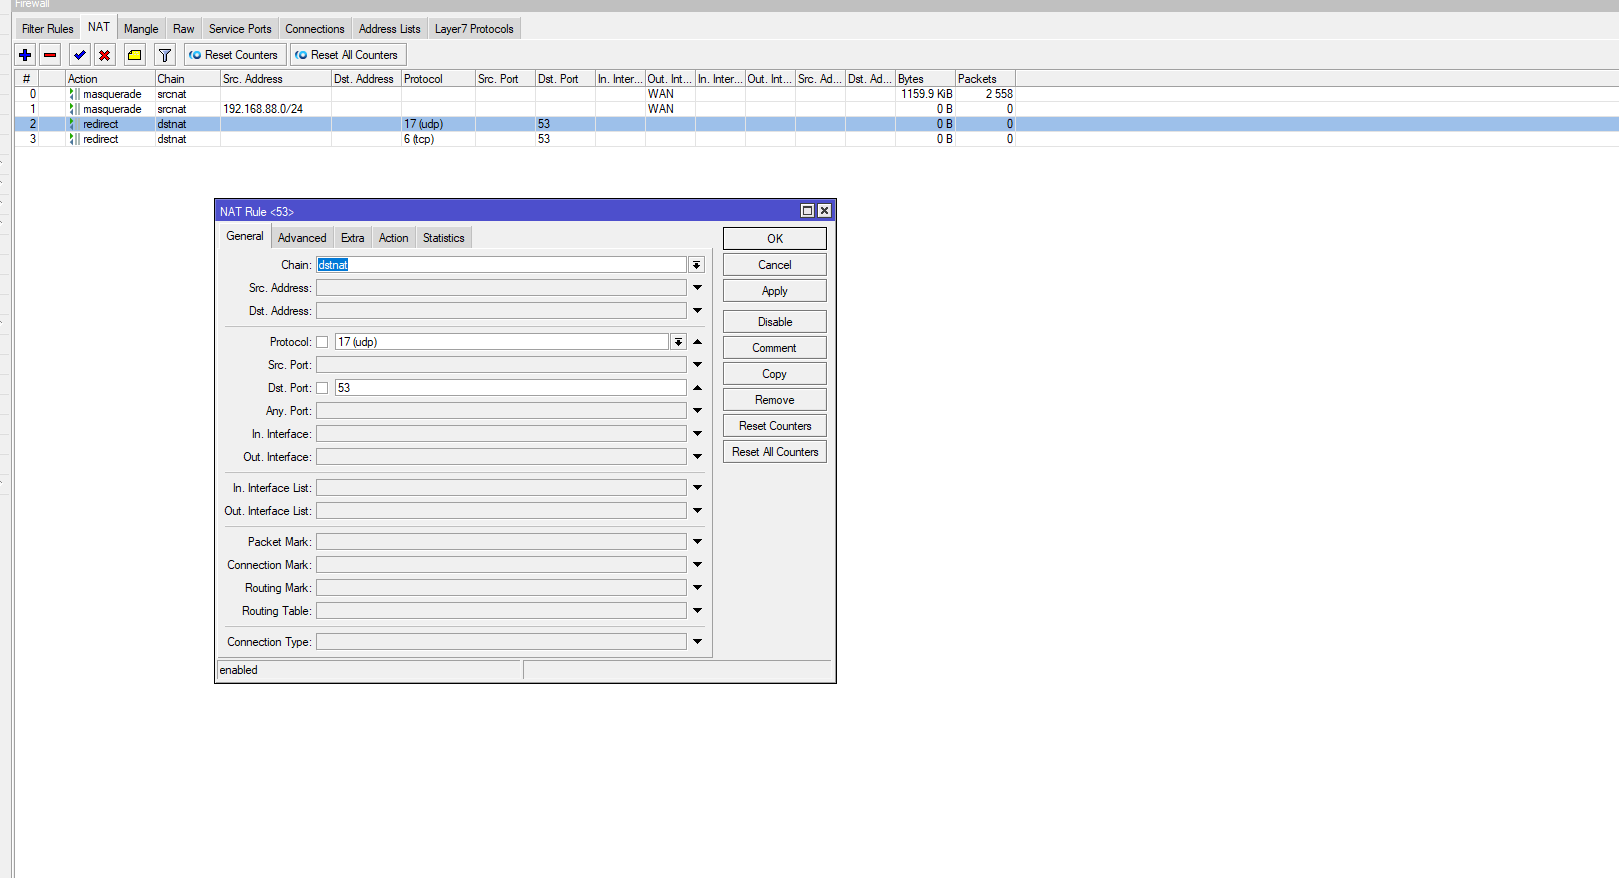
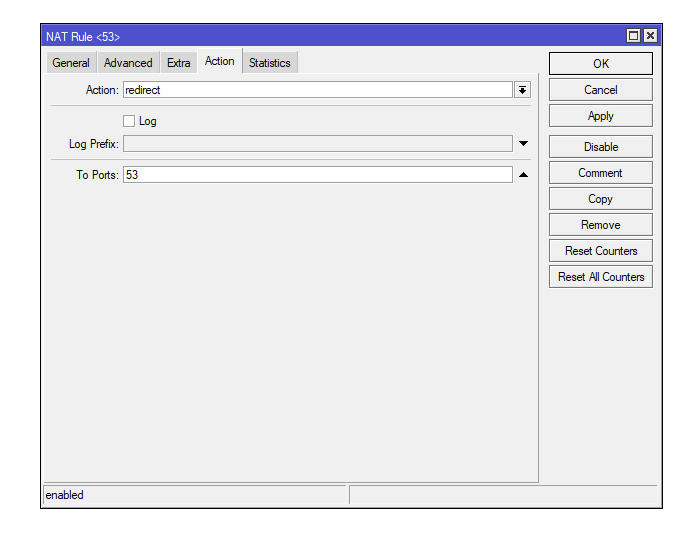
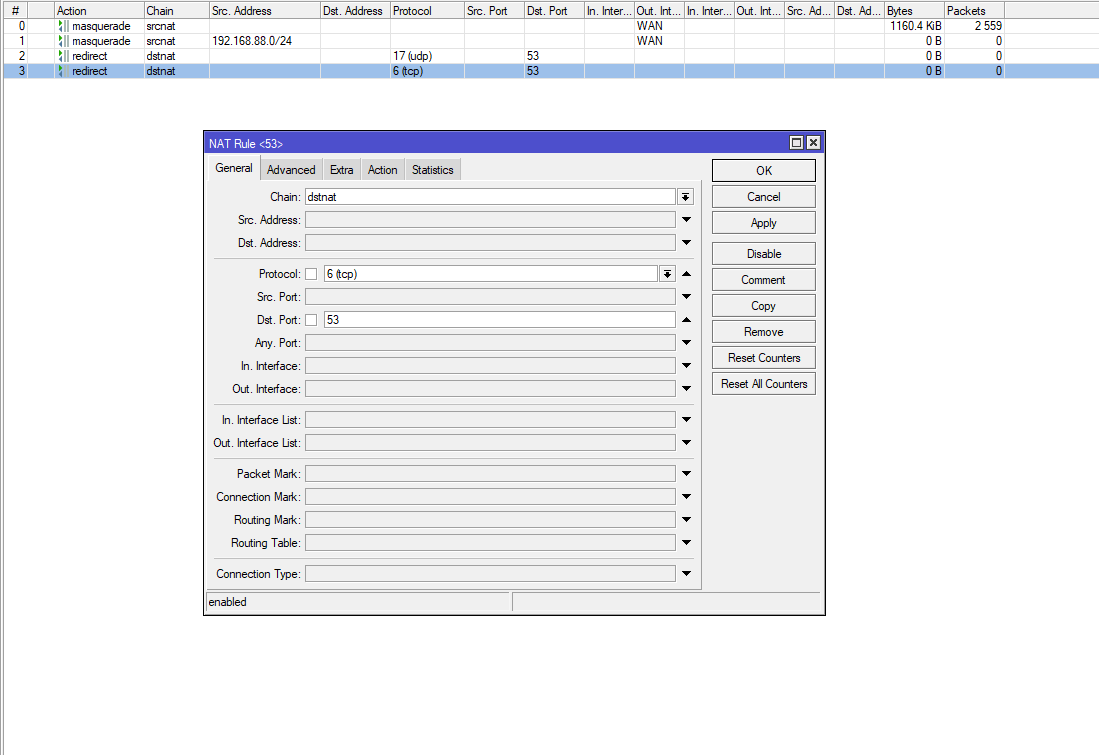
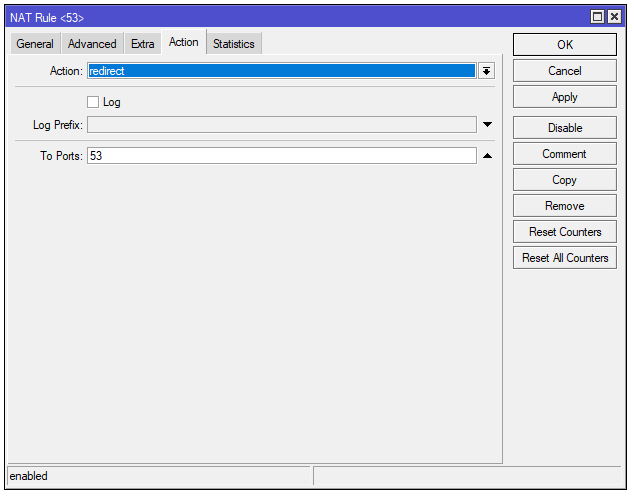
Using the GUI, the configuration would be as follows:
These screenshots correspond to the DNS traffic redirection configuration.
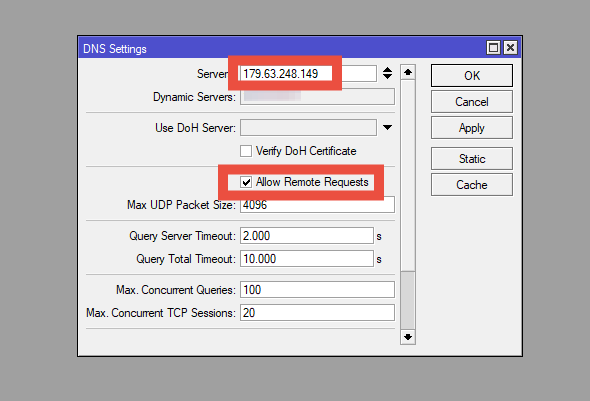
This screenshot corresponds to the configuration of the RPZ DNS IP addresses and the enabling of DNS cache usage.
Brief Summary of the Previously Mentioned Options
1- Redirecting DNS Traffic to Port 53: Configure firewall rules to capture all DNS traffic (both UDP and TCP) using port 53 and redirect it to the router itself. This ensures that all name resolution requests pass through the router, regardless of which DNS server devices on the network attempt to use.
2- Configuring the DNS Server on MikroTik: Specify the DNS server that the router will use to resolve DNS requests. This configuration allows the MikroTik router to act as an intermediary, forwarding requests to the configured DNS server (for example, a public or private DNS server).
3- Allow Remote Requests and Enable DNS Cache: Enables the router to accept DNS resolution requests from devices connected to the local network. By doing so, the MikroTik can act as the network’s DNS server, resolving queries and caching responses to improve performance.